Odoo lets you manage your company's accounting from A to Z and that includes preparing payments for your vendor bills. In Europe, this means generating SEPA payment files, which Odoo handles very well. In this article, we will go through the process of creating those payment files in Odoo and we will see how the rest of the process (i.e. what to do with those files) can be automated to increase your productivity.
Making SEPA payments from Odoo
Odoo can generate those payment files for your vendor bills and for your invoices, for the customers that have signed a direct debit mandate. We will focus on the former today but the process for the later is very similar and is well documented by Odoo.
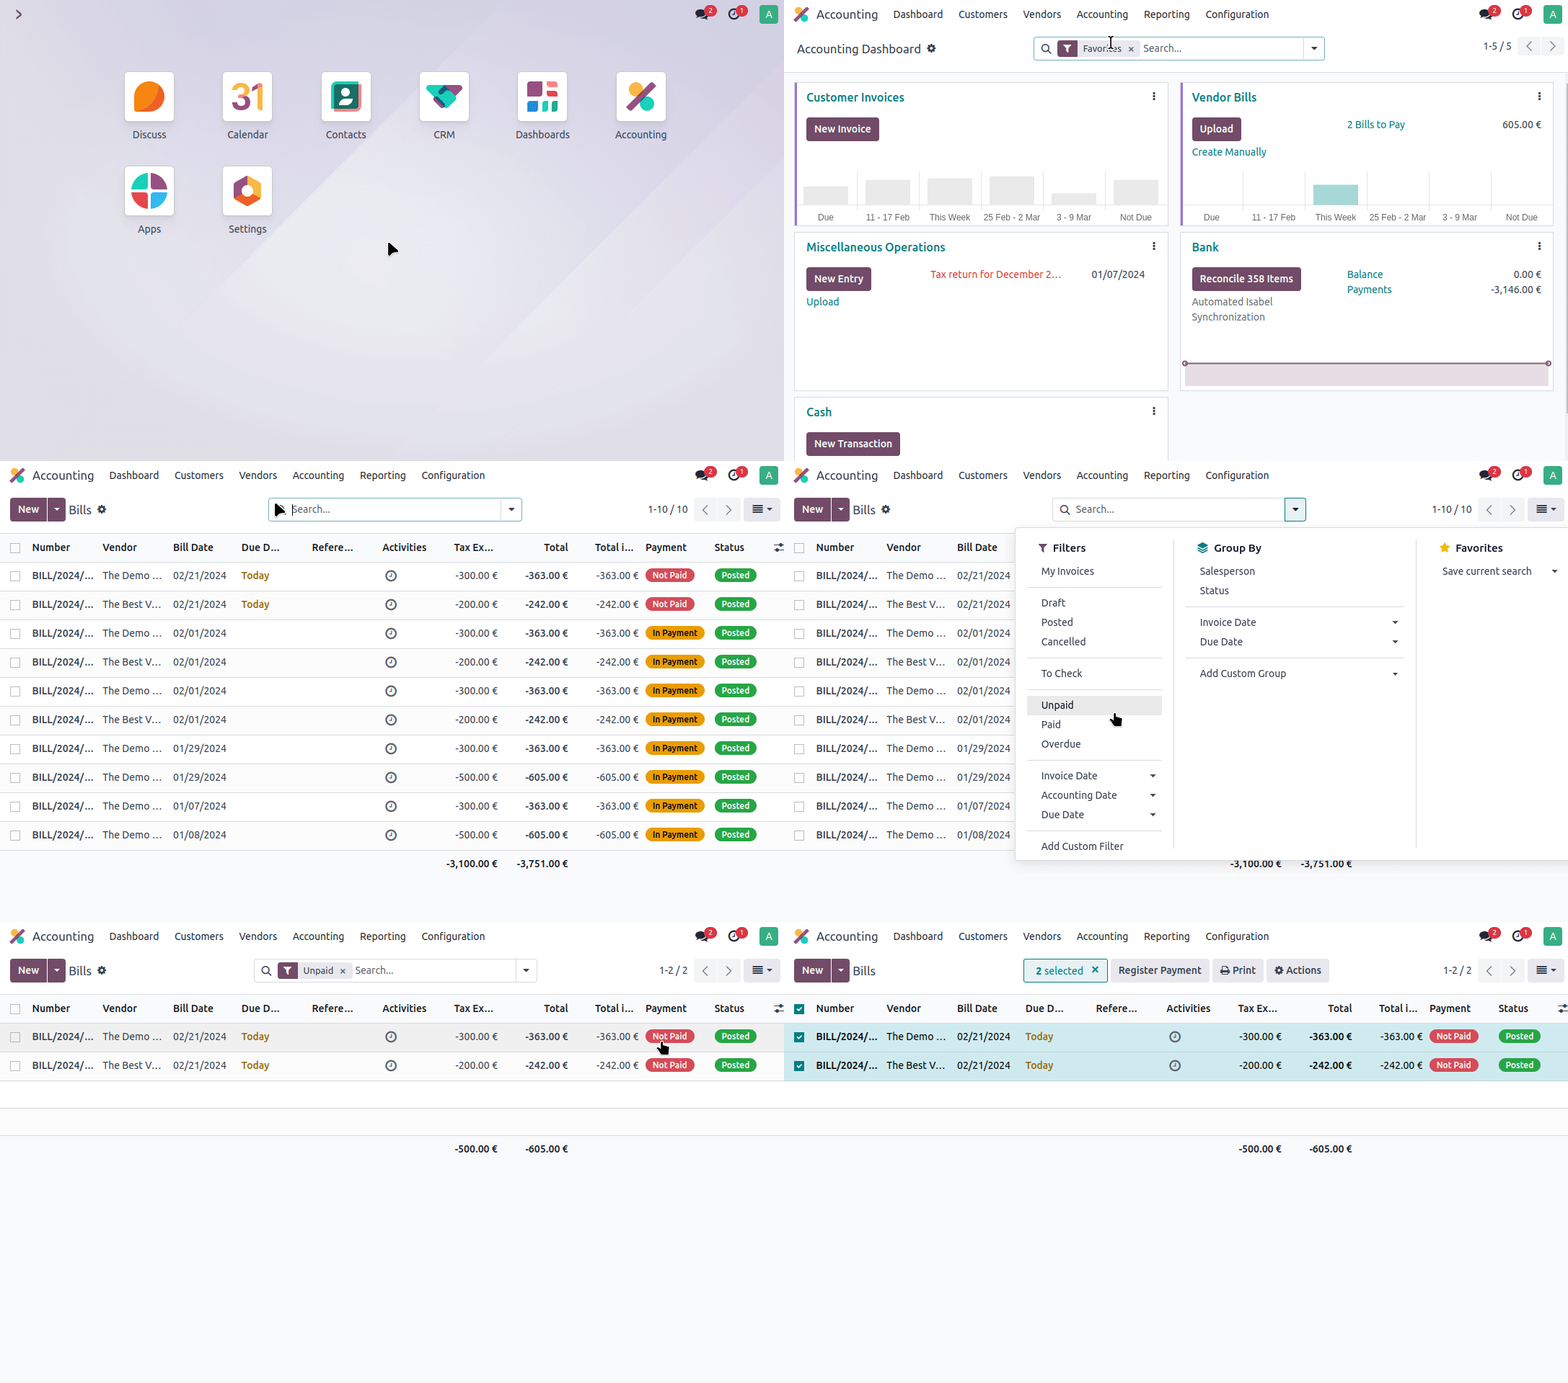
1. Selecting Bills to Pay
Let's start by selecting a few bills that need to be paid. In your accounting app, under Vendor Bills, you will be able to identify the bills with the Payment column set to "Not Paid". A filter can be used to only display the bills that are "Unpaid".

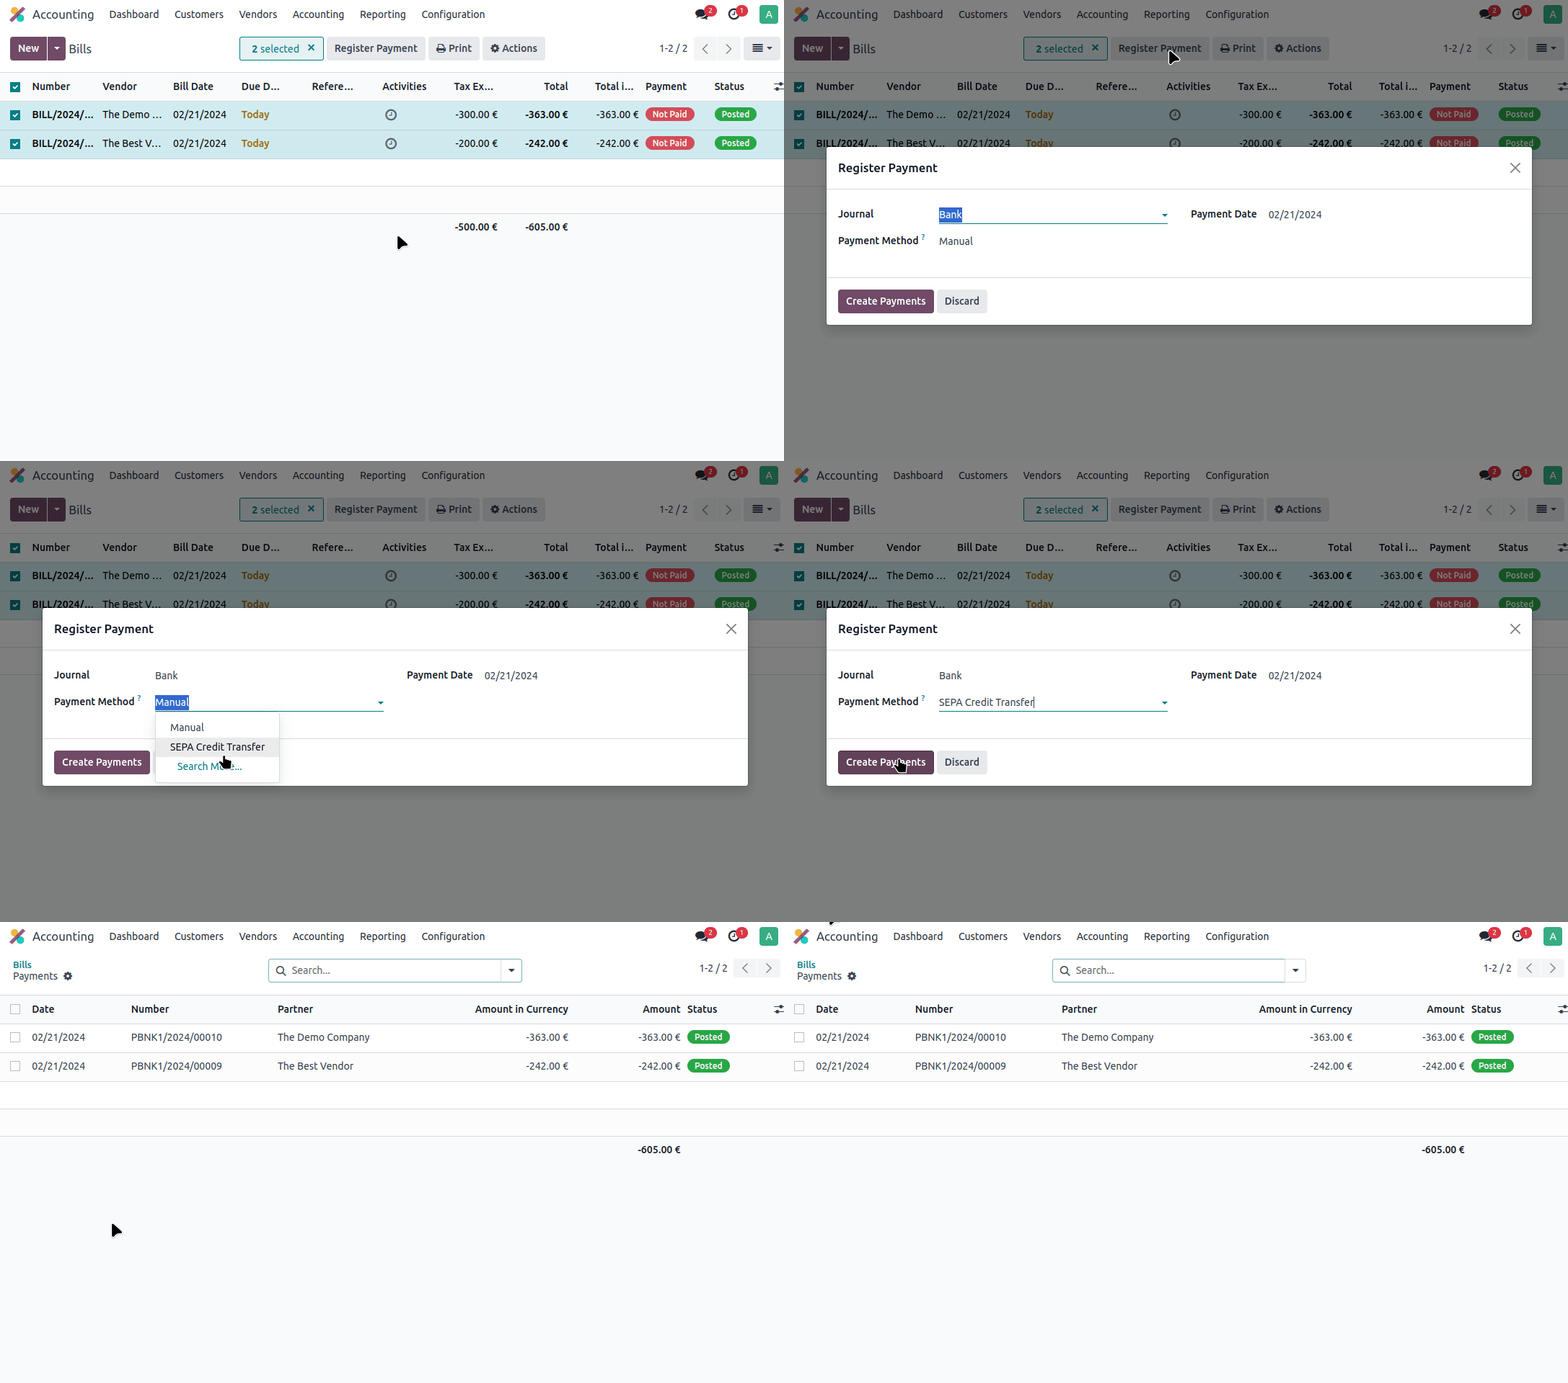
2. Register Payments
With the vendor bills selected, click on the "Register Payment" button at the top of the list. A popup will open, notice that you will need to select the correct payment method: SEPA Credit Transfer - if you can't see this option, you need to activate it in your Odoo Settings.

Once you have clicked on the "Create Payments" button, Odoo will redirect you to the list of Payments it just created for you.
3. Create Batch Payment
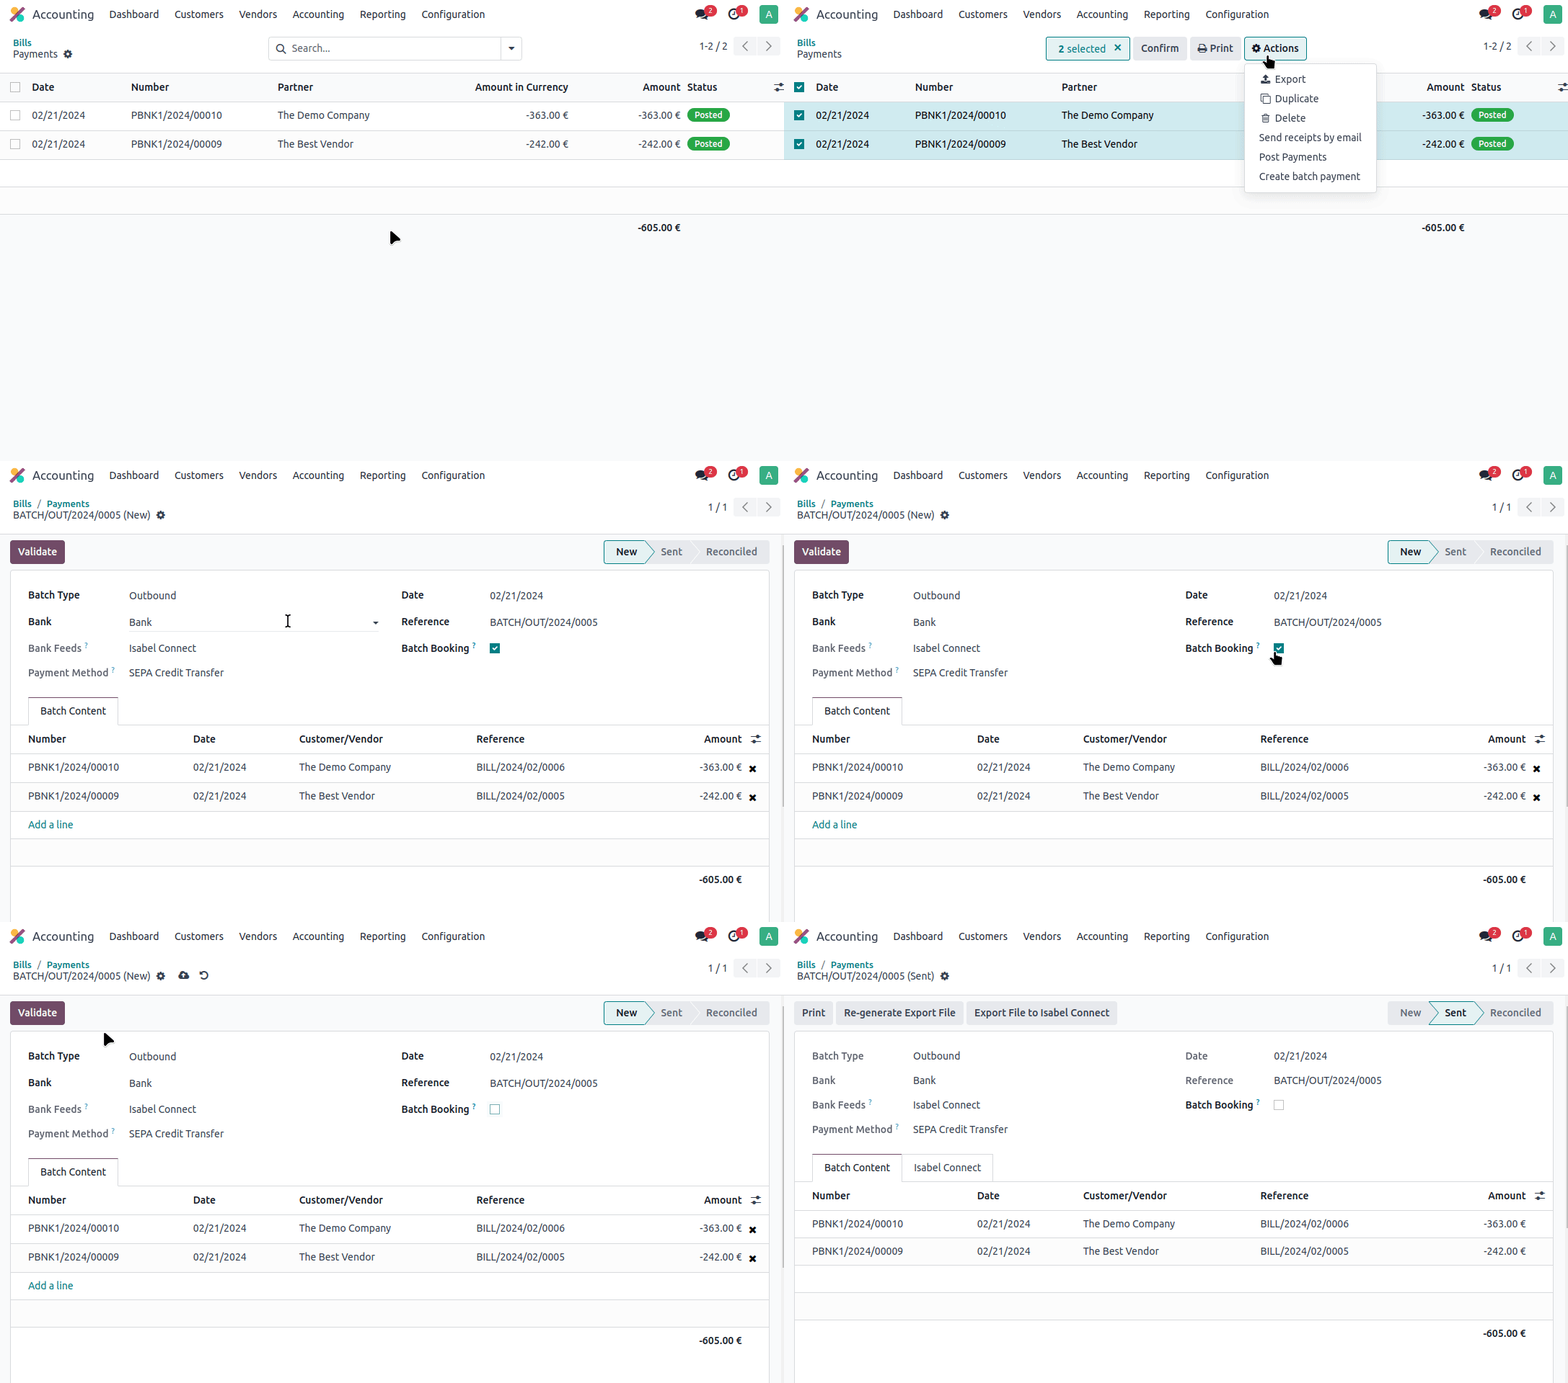
From the list of payments, you will be able to create a "batch payment", which is ultimately what will generate the SEPA file. Simply select all your payments you want to include in the batch and then click on the #Actions button. In the list of actions, select "Create batch payment" which will open a new page with the information of your payment.

From here, we will have to check the data. Make sure the list of payments (under "Batch Content") is correct. You can also modify the date of the payment - which is usually best to have a few (business) days in the future since some banks will frown upon SEPA payments to be executed the same day. Also, make sure you understand what the "Batch Booking" checkbox does, since it will have an impact on how the payments are made: if you keep it checked, the bank will only show one payment made from your account for the entire batch instead of listing one transaction per payment in your statement. We usually uncheck that box to facilitate the reconciliation of the transactions later.
Once you have checked all the information on the screen, you can go ahead and click the "Validate" button.
4. Download the SEPA file
Of course, the only thing left to do is download the SEPA file...

... and :
- Open another browser window;
- Go to your bank's website;
- Connect to your Online Banking - make sure you have your authentication ready (digipass, itsme...);
- Find the menu, open the page that lets you upload SEPA files;
- Fill-in the form, select the SEPA file to upload (make sure you have selected the right one, you may have more than one in your Downloads folder!) and submit the form.
Oh and since you are probably not the one approving/signing the payments, you now have to send an email to the person who is - to notify them.
The Problem
You probably guessed it, although the final steps of the process aren't complicated, they are a real productivity drag. Needless to say these types of tasks are clear-cut candidates for automation: they are repetitive, need to be done frequently (unless you don't have vendor bills to pay that often) and are prone to human errors - which could end-up being quite expensive!
The Automated Solution
Remember the end of Step 3 above, right when you validated the batch payment? With Isabel Connect installed on your Odoo, your entire process would stop there. There would be nothing else to do: Isabel Connect uploads your batch payments automatically to Isabel every day and, if you want, notify anyone in your organisation once it's done. In turn, they will have to connect to Isabel 6 (instead of the bank) to approve and sign the payments before they can be sent to the bank for execution.
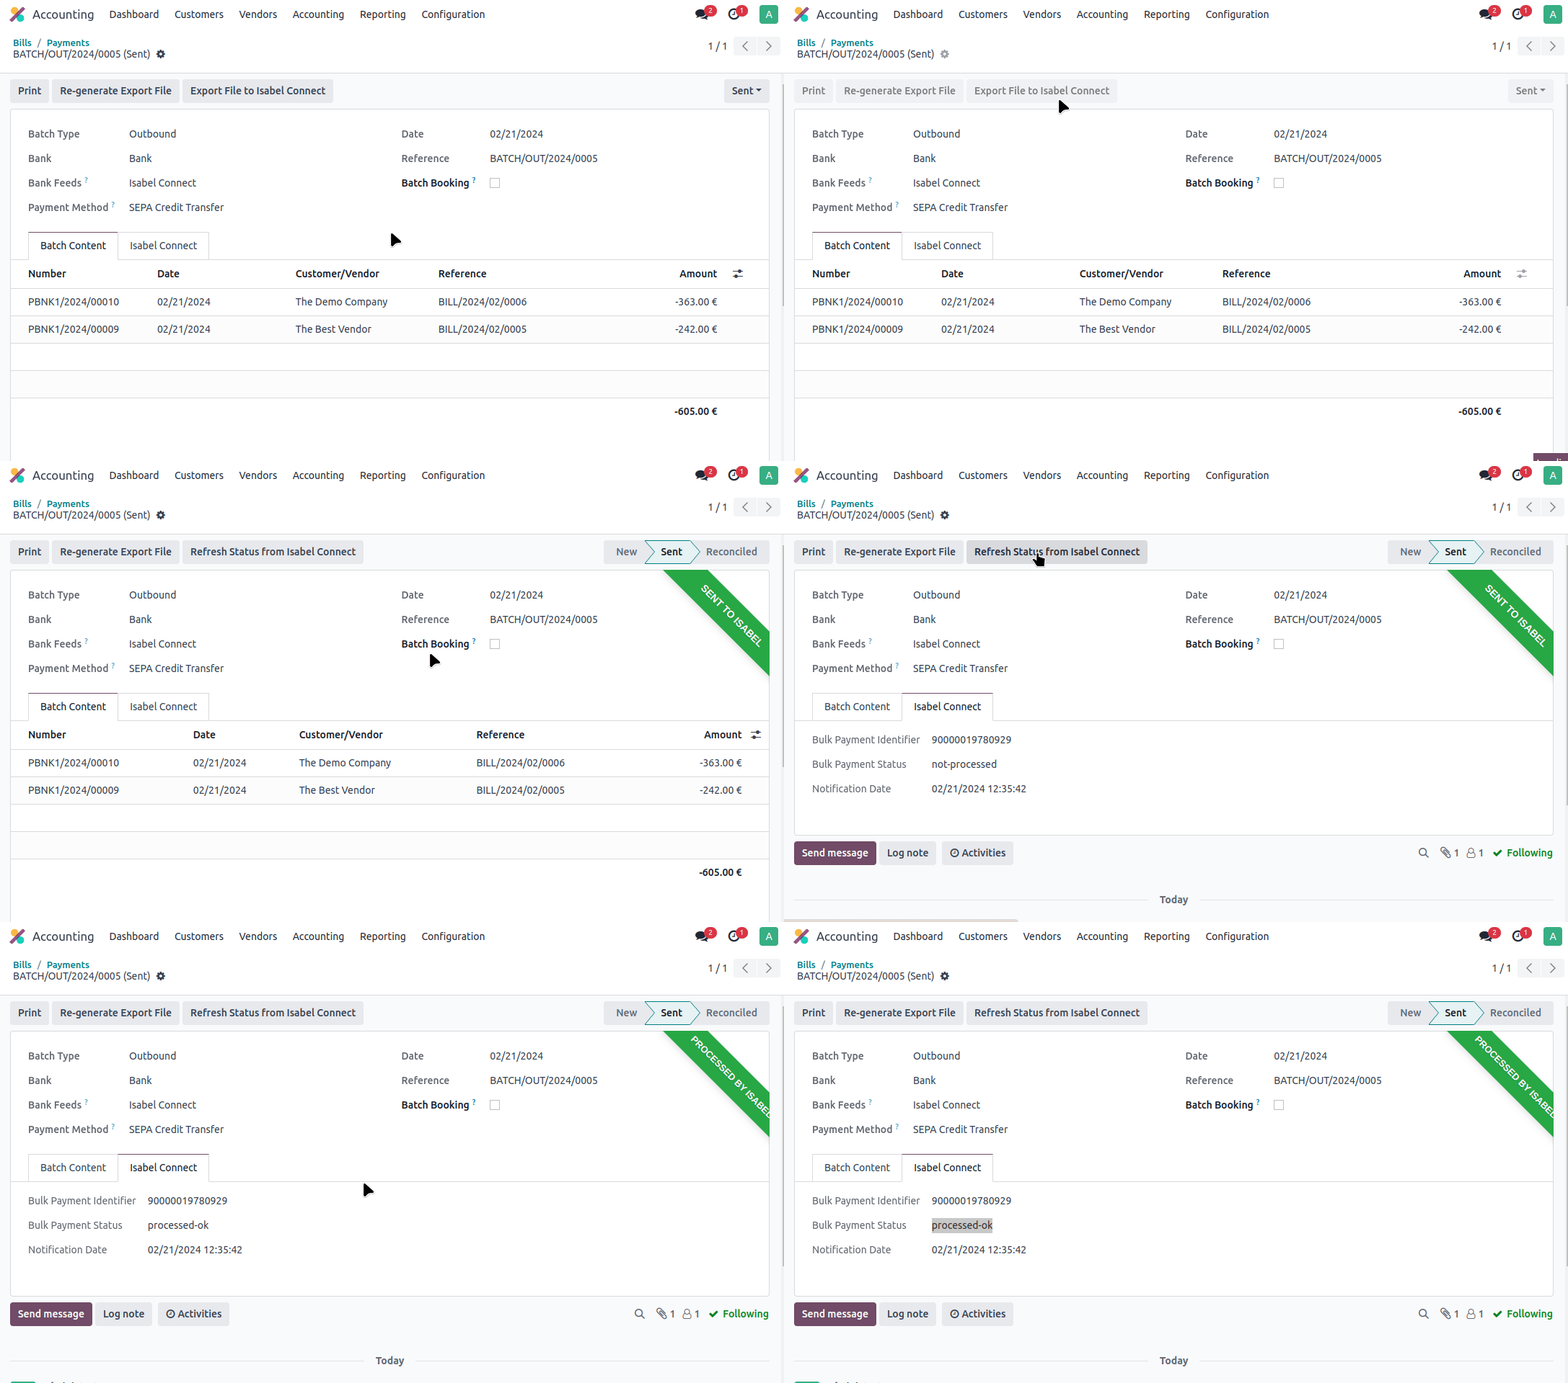
Now, Isabel Connect comes with an extra button at the top of the batch payment page, called "Export File to Isabel Connect". You could click on that after validating the batch, which would send the SEPA file to Isabel immediately... but if you are not in a hurry, it can be done automatically after a little while.

Of course, a status is displayed on the batch payment once the SEPA is sent to Isabel.
Discover Isabel Connect Live
Come and join us for a live demonstration of Isabel Connect, during a free online webinar - it's a great way to meet with the team building Isabel Connect and ask all the questions you may have on the solution, no strings attached.
Can't Wait for a Demo?
For any burning questions, feel free to reach-out below.
Optimizing Payment Preparation in Odoo